Refinishing Tutorial: Firearm Metal Finishing
My basic technique is thorough surface preparation, phosphate coating, and polymer (paint) final finish.
The gun finishing process commonly known as “paint over park” can be a fun and exciting process for both the home hobby gunsmith and the retail gun shop. This tutorial will give you a better understanding of the process, and help you to decide if it is a venture you wish to undertake yourself. Arizona Response Systems offers high quality”paint over park” for firearms (METACOL III Polymer coating over Manganese Phosphate) . Check the website for options and prices.
“Parkerizing” is a trade name owned by the Parker family, which developed the process in the late 1800s. It is currently owned by Parker-AmChem Company, but has become so common in today’s language that it is frequently used as a generic term rather than a brand name. The process covers a wide variety of phosphate deposition coatings. The most common for the military firearms industry are zinc phosphate and manganese phosphate.
The phosphate deposition process leaves a non-reflective coating on ferrous metal. This coating is an adequate protection against corrosion and abrasion in its own right, but additionally acts as a sponge to absorb oil for greater corrosion resistance and is an excellent primer coat for paint. The process can be adjusted to result in a variety of grain structures, from coarse to superfine, and in a variety of coating thickness usually measured in mass/surface area. Most commonly, it is an immersion process, but it can also be applied in a spray. Phosphates have excellent anti-galling properties as well.
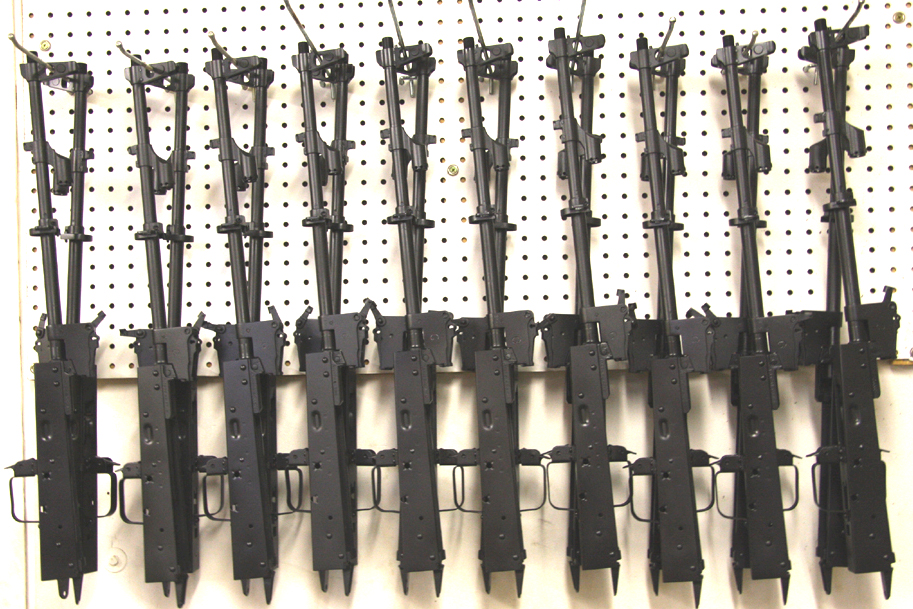
You cannot phosphate stainless steel, aluminum, brass, or copper. Best results are on carbon steel. Steels with high nickel content such as some older Winchester parts, and AK-47 bolt-carriers may not take as well. Zinc phosphate is a light to medium gray, depending on hardness of base metal. Manganese phosphate runs a medium to charcoal gray. Manganese phosphate is most popular with my customers.
An expanded, video version of this tutorial is included in my “Gunplumber’s Guide to Gunsmithing: Kalashnikov Rifles,” available in the Web Store.


I run my parts through an ultrasonic cleaning tank to remove any oils before sand blasting. You cannot sandblast grease – it just pushes around. Thorough cleaning in hot soapy water will make the blasting step much easier. Blow dry with compressed air.
You may get some spot rust during this process, but it will be more of a dust layer and will come right off in the sand blaster. If there is any doubt as to your ability to get the parts thoroughly dry, wait on the degreasing until you can progress immediately to the blasting step.


The sandblaster generates static electricity which electrically charges the fine paint and sand dust and causes it to stick to the surface of the metal. This will result in the phosphate “wiping off” as it is the dust and the not the underlying metal that takes on the color.
I give all my barreled actions a rinse in denatured alcohol immediately before going into the park tank. They can still have alcohol on them – it will just boil away. If you are using a gas or external electric burner for your tank, be careful not to ignite any alcohol drips. I got careless – once. Never again! Immersion heaters are the most expensive and complicated to set up, but the safest and most efficient to use.
Water does not cut the fine dust very well. MEK and lacquer thinner work, but are harsher and more expensive chemicals. I just recycle the alcohol – the dust settles out overnight, and I can pour almost all the alcohol into a new rinse bucket the next day. A gallon did 30 rifles with about 3/4 gallon recycled for next time.
One application of phosphate coatings that has been particularly useful in my business is to test questionable parts. There are some receivers and parts that are advertised as originals but are actually welded together from demiled components. Some weld jobs are beautifully surfaced and nearly impossible to detect visually, but if the item is phosphated, there will usually be a shift in color on the welded spot. Softer metals show up darker than harder metals and it is rare that a welded area will have the same color as the rest of the part. Silver soldered parts and brazing will also show up, where the braze line may have been covered by a different coating.


Those grains that do not adhere, called “flock” fall to the bottom of the tank and create an unusable “flocculent sludge.” The sludge must be periodically filtered out of the tank. When the part stops bubbling (gassing) it is removed from the tank, rinsed, inspected, then immersed in a water-displacing oil and hung to dry or wiped down. If the part is to be painted, it is dried with compressed air and not oiled.
The type of oil causes a change in color of the phosphate finish, darkening it (called “curing”).
Color changes can also be induced through long-term storage. Cosmolene (not a petroleum product, but a lanolin-based organic grease) and other gun-care products, as well as surface oxidation and years of cleaning and rubbing, cause phosphated surfaces to take on a greenish brown tint. This color, which I will call “patina” is one many gunsmiths wish to duplicate in restoring rifles, such as the M1 Garand.
- cleaning solvents
- cleaning container
- air compressor
- sand blaster
- barrel and chamber plug (bullet and empty casing)
- small parts basket
- rinse tank (any material)
- pretreatment tank (optional – any material)
- pretreatment chemical (optional)
- processing tank (stainless steel preferred)
- phosphate solution
- heating unit
- thermometer
- safety equipment (gloves, apron, goggles, baking soda, etc)
- oil tank
- water displacing oil
- drip area (towels, hangers, etc)

Blow dust off with compressed air, and immediately before putting in the phosphate tank, rinse with denatured alcohol. MEK or Acetone will also work, but are more expensive and more hazardous to work with. Insuring your hands are clean, or wearing disposable gloves, place parts in wire mesh baskets or hang with degreased black-iron wire (concrete section of hardware store).
Immerse parts in the optional pre-treatment (rinse conditioner – usually a titanium dioxide solution) per manufacturer’s instructions – a few seconds is fine. Do not rinse – put directly into the phosphate bath.
The phosphate bath is best heated by an industrial immersion heater. This is very expensive. Heating over flame or external electric element can cause hotter spots in the tank, which will cause a faster buildup of hardened sludge. For low volume, it may not be cost-effective to use an immersion heater. Also, a stainless steel tank will not react to the solution as much as a carbon-steel tank. However once a layer of phosphate has built up on the surface, it becomes non-reactive. If using a stainless pot, make sure the rivets holding the handles are not aluminium. Over time, aluminum rivets will dissolve, causing the handles to fall off.
Bath temperatures are going to depend on the particular brand of solution, coating thickness desired, and immersion time. This is where the technical side of phosphating far exceeds the requirements of the home gunsmith. Typically, the hotter the solution and the longer the immersion time, the heavier the coating. However too high a temperature will increase the amount of phosphate expended that does not adhere to the surface of the metal, but falls away as flock. You must not allow the solution to boil. I have used a variety of brands, and find that 180 F is a good starting point. Raise the temperature (max 200 F) or increase the immersion time. It is of no value to keep a part in a tank after the gassing has stopped, as no further reaction will occur, so my standard is 15 minutes, or until the gassing stops, whichever comes first.
Remove from tank. Rinse in clean water. The hotter, the better, as it will dry faster. There may be a thin layer of white flock on the parts, which can be scrubbed off with a brush. For hollow parts, I keep a variety of long-handled round brushes available – some bottle brushes from a paint-supply store, and larger brushes used for cleaning vents. For rifle barrels, run a brush through the bore. On deep, blind holes like an AK-47 bolt carrier, you may be surprised to find some sand coming out with the rinse. Inspect the part. If there is a minor flaw, the specific area can be cleaned and blasted again, then the whole part returned to the solution. Only the blasted portion will undergo a reaction. If a large area is flawed, then it is best to blast the whole part and start again.
Using compressed air, blow all the parts completely dry. If phosphate is the final finish, dunk in water displacing oil like WD-40, hang to drip dry and/or wipe dry with paper towels (be mindful of the fire hazard inherent with oil soaked paper towels). If the parts are going to be painted, paint as soon as possible or store in a very dry area. The virgin material can get a fine dusting of rust if not oiled. Sometimes this dusting is caused by impurities in the rinse water oxidizing. I am fortunate to live in a dry environment. For those in high humidity areas, paint as soon as possible.
Typical phosphate solution concentrate is about $51 per gallon and enough to do at least 20 complete rifles. If an accurate measure of the reactivity of the solution is desired (total acid to free acid ratio), you will need to buy titrating equipment – see advanced techniques section. My experience has been that it is a waste of time. It is far less expensive to completely replace the solution than to determine how much of which chemical should be added to balance the tank.
An 18 gauge black iron tank from Brownells lasts me about 6 months of heavy use before the acidic solution eats through the tank. The life of the tank can be greatly increased by storing the phosphate solution in plastic buckets when not being used. Practice with handguns, magazines, or small parts, on the kitchen stove with a $20 stainless stock pot or porcelain canning pot. It is easier to learn with small containers and you have less up-front investment if you decide against continuing.
A new solution will not produce an appropriately thick coating until conditioned, either by processing non-important parts (such as those being painted), or the one-time addition of a little steel wool or iron powder in a cheese-cloth sack, usually in a low temperature tank for about an hour – see manufacturer’s suggestions for details.
Five gallon buckets make good rinse tanks for smaller parts. I use a 50 gallon utility sink as a rinse tank. Cold water is fine, but hot water dries faster.
If using a gas heater, keep the fans and your air-hose away from the flame as it will make it hard to maintain a consistent temperature. I blew out my flame several times before using a piece of roof-flashing to shield the flame.
A 40″ Brownells tank fits diagonally on many kitchen stoves. Keep stirred as the heating elements will not hat the tank evenly.

The floc is poisonous. The phosphate solution is poisonous. The phosphate concentrate is acidic and can burn you. The phosphate solution is acidic, but the lower concentration. Maintain adequate ventilation and wear gloves, goggles, and an apron. Follow the manufacturer’s specific precautions. I’ve fished parts out of a 140 F tank with bare hands to no ill effect, but people have different sensitivities to the acid. I have also spilled a large quantity on my pants and received minor burns – like a sunburn, which no amount of rinsing eased – baking soda cooled it off.

When making a new tank, to avoid waste, save your old solution to add as a replacement for evaporation.
You can age your parts by baking on an oil. This is a dirty process that yields noxious fumes, so should not be done in the kitchen. Dip your gray part in a medium weight oil, like motor oil, or smear with a heavier grease. Dry thoroughly. Place part in a 400 F oven for 20 minutes. Inspect. Increase time if necessary, checking every 5-10 minutes. As the oil burns, it darkens the surface of the metal, aging it to a green-brown tint. Quaker State wheel bearing grease has a greenish tint. I use Castrol or Coastal amber wheel bearing grease for a nice patina, but I choose it because it duplicates the color of Cosmolene and I use it for other things around the shop.
manganese phosphate formula (Richards)
- 61 grains phosphoric acid 1.5 SG
- 37 grains manganese dioxide
- distilled water to total 1 quart
manganese phosphate formula (Parker)
- 365 grains phosphoric acid 1.5 SG
- 22 grains manganese dioxide
- distilled water to total 1 quart
- 2 x 100 ml conical flasks
- 10 ml graduated cylinder
- graduated glass eye-dropper
- normal 10 sodium hydroxide solution
- phenolphthalein (reagent)
- bromophenol blue (reagent)
- 75% technical grade phosphoric acid
- sodium hydroxide (caustic soda, or lye)
Titrating for total acid content: Put a 10ml sample of phosphate solution from your tank into the first 100mm flask Add 5 drops phenolphthalein to flask and swirl to mix. Add drops of N10 Sodium Hydroxide. Count the number of drops it takes to change the color to pink and hold the color for 15 seconds (May take 20-40 drops). The number of drops is your total acid content.
Titrating for free acid content: Put a 10ml sample of phosphate solution from your tank into the second 100mm flask. Add 5 drops of bromophenol blue and swirl to mix. Add drops of N10 Sodium Hydroxide until solution turns light blue. Number of drops is your free acid number.
Two burettes with stand is a more accurate measurement of “drops.” 1 drop = 1 ml. This test can be done with a dropper, but it has to be graduated, so that you can read what’s been added. Dispensing from a graduated dropper tube is tricky at best, and the risk of overshooting the end point color change is high.
Adjusting the free acid can be difficult with volumes of solution used in small scale phosphating processes. It takes only a small amount to affect the ratio. Too much caustic soda will neutralize the free acid, and cause the metal phosphates to drop out of solution. Adding more acid won’t put them back.
- Example: #1, First flask, 27 drops to turn pink. Second flask, 9 drops to turn blue.
Ratio total:free = 27:9 or 3:1. Add 75% technical grade phosphoric acid. - Example: #2, First flask, 28 drops to turn pink. Second flask, 4 drops to turn blue.
Ratio total:free = 28:4 or 7:1. Add sodium hydroxide or sodium bicarbonate. - Example: #3, First flask, 30 drops to turn pink. Second flask, 6 drops to turn blue.
Ratio total:free = 30:6 or 5:1. Phosphate solution is ideal.

Hold in front of receiver and paint all inside surfaces through the magazine well, the rear trunion opening and top of receiver. Keep your paint volume a little low and your air pressure a little high. There are a lot of surfaces inside the receiver that need coverage, but but are not cosmetically important. Be particularly careful around edges to apply multiple light passes. A heavy pass will walk around the edge to the visible external surface.


Leave a Reply
You must be logged in to post a comment.